
Overview
Intellij IDEA is an alternative to the popular Eclipse IDE for Java (as well as other language) software development. Intellij has a free community edition with limited features, is free for open source projects and academics, and has reduced cost for startups, however the full version must be paid for but has a 30 day free trial.
Download and Install Intellij IDEA
Download and Install Intellij here. For this example I have installed the free 30 day trial.
Install a Java Server
Intellij does not include a server by default so you will need to install one. For this example I will install Glassfish using brew:
brew install glassfish
Glassfish is at v4.1.2 at time of writing and installs to the following directory on my mac: /usr/local/opt/glassfish/libexec.
Alternatively you can download Apache Tomcat from here or use brew:
brew install tomcat
Create a new IntelliJ project
From the main menu select File > New Project:
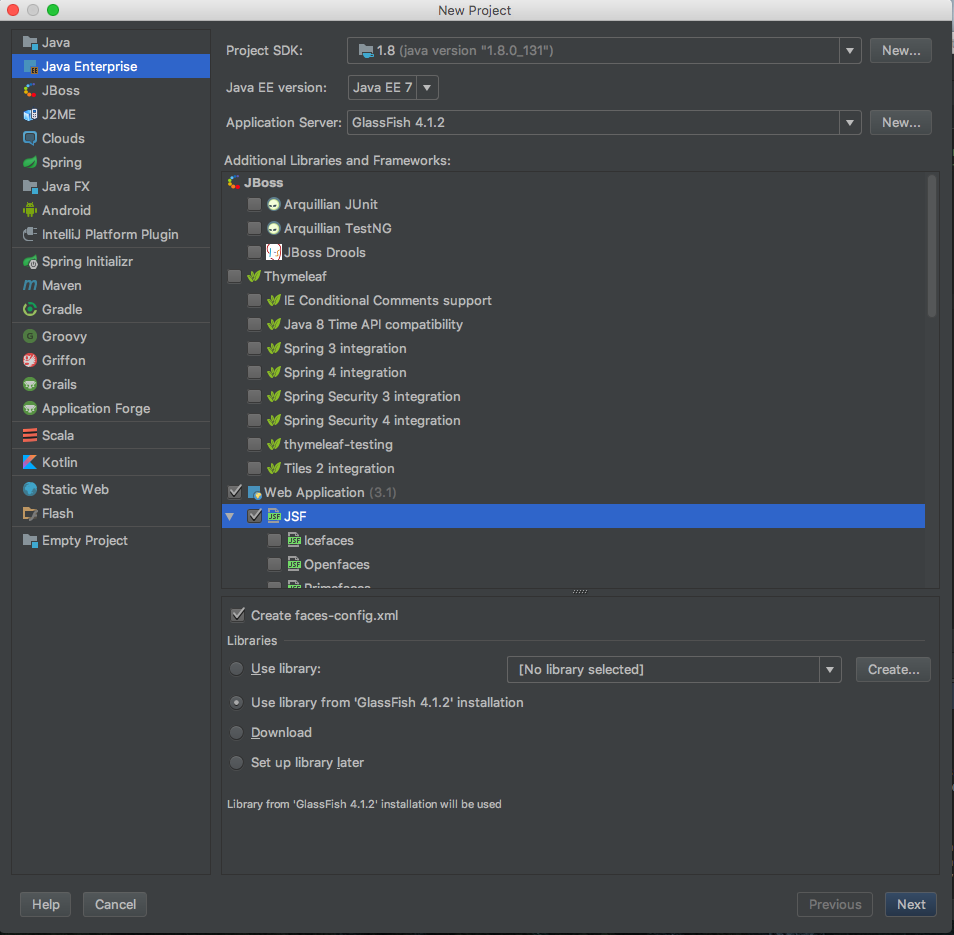
Select the ‘Web Application’ and ‘JSF’ boxes as shown, as well as ‘create faces-config.xml’ then click next and name your project and click Finish. The new project will take a few moments to index.
Configure the Server
In my example the Server is already configured but if you are creating a project for the first time you may need to do this manually by clicking the plus icon in the top right corner – select your server, in this case Glassfish, expanding the list if it is hidden.
In the top right corner from the drop down menu select Edit Configuration and on the tab ‘Server’ and the field Application Server click the configure box. Add the Server (Glassfish) path here – in my case this was ‘/usr/local/opt/glassfish/libexec’ but may be different on your machine.
Select the ‘Server Domain’ from the dropdown, in my case this was ‘domain1’ and click OK.
I have Google Chrome set as the default browser, but you can have any browser you wish here.

Build and Run your Application
Click the green play button in the top right corner or select from the menu Run > Run – you should select the server name, in my case it showed ‘Glassfish 4.1.2’. The application builds showing console output as follows:

If all goes well the browser will launch with the default Hello world XHTML page!


